How to Effortlessly Complete a Mass Record Update

Contents
People come and go – it’s a fact of life within any organization. There may be no hard feelings when one of your team members has decided to move on to their next chapter, but how hard is it to transfer their workload? Getting those new and existing opportunities assigned to a new owner is a top priority. After all, no one wants to leave leads just floating in the wind after a staffing change…
This is one of many scenarios where Acumatica’s mass update feature makes your work life much easier. In just a few steps, you can update multiple records and spend your time and effort where it really matters.
1. Identify New and Open Opportunities
Today’s the day. Eric, one of your top performers in sales, is leaving the company to pursue his dream of fly-fishing. After wishing him well, you want to make sure all those quality leads end up in the right hands.
First, let’s start by identifying all the new and open opportunities that were assigned to Eric. Using Acumatica’s advanced filters, we can search for Eric by name or Employee ID and set the status of Opportunities we’d like to return to New and/or Open.

Using this same method, we can search for the owned opportunities of another sales lead, Jay. We can see that Jay has 24 total opportunities, so let’s assign some of the leads that belonged to Eric, to him.
2. Enable Mass Record Update by Field
When changing a single record, we’d usually go the route of opening it, changing the necessary field(s), saving, and closing. However, with multiple records to update, this can get a little tedious.
Using the mass update feature is much more efficient than manually updating each record (remember, we say “bye-bye” to manual processes wherever we can). The is simple:
-
- Go to Customization
- Edit Generic Inquiry
- Select the Entry Point tab
- Within Operations with Records, select Enable Mass Record Update
- Select the new tab Mass Update Fields
- Add and select the Owner field
- Save and navigate back to the Opportunities Advanced Filter
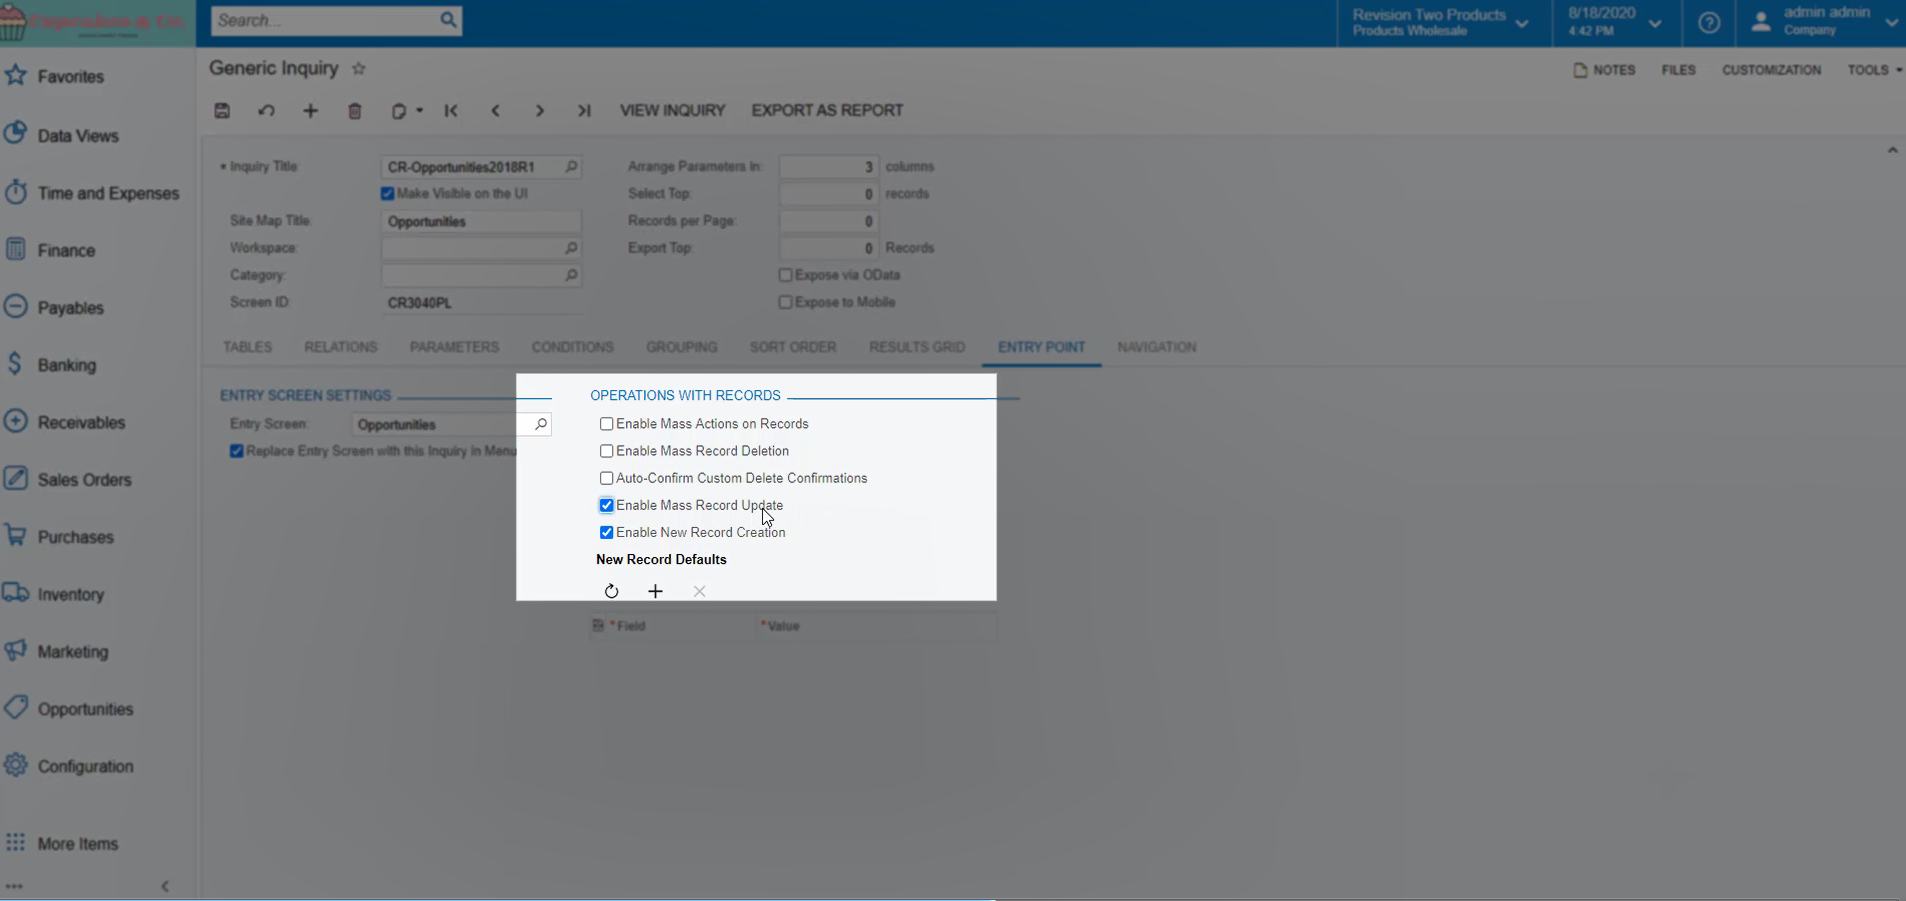
It’s important to note that when making mass updates, you aren’t limited to just one field. In this example, we only need to change the owner. However, in Acumatica, you’re free to update as many fields as you choose.
3. Assign the Opportunities
Once you’re back to Opportunities, you should now see a new Actions button. From this drop-down, you can either select Update or Update All. We don’t want to overload Jay in Eric’s absence, so in this case, make a few selections and click Update. Confirm the field you’d like to update as Owner, assign the Value to Jay. Now, you’re on your way!
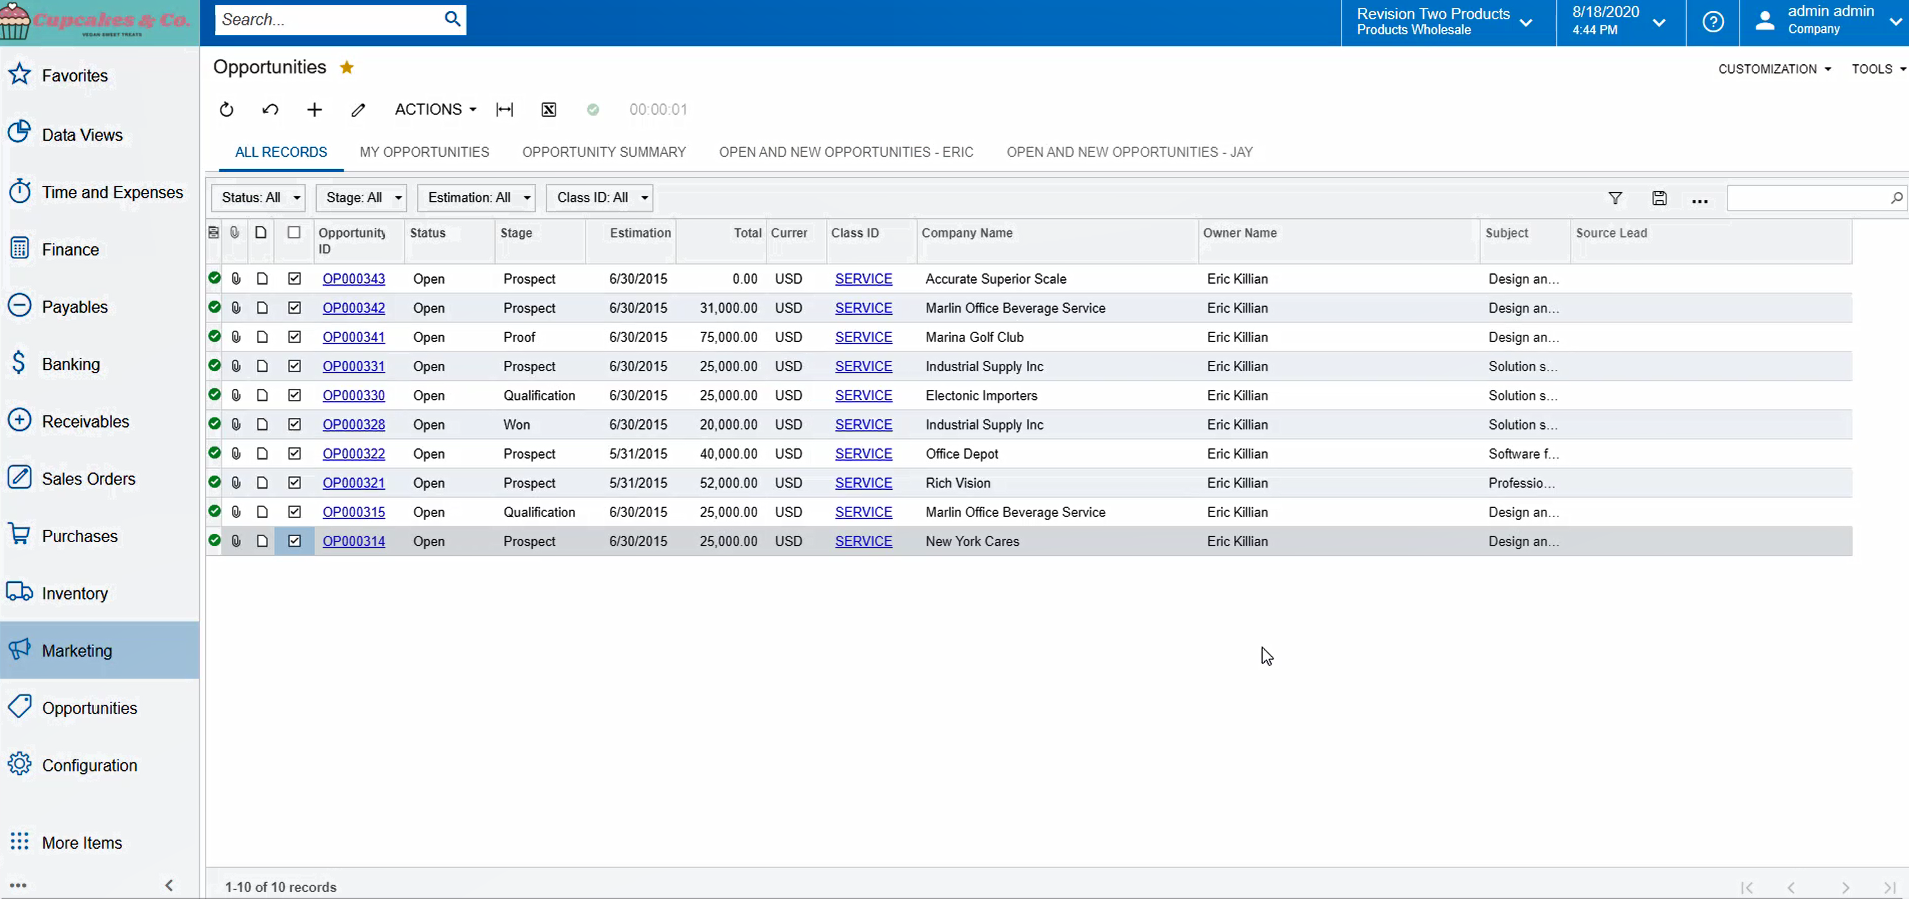
When you refresh, you should see that Jay is the new owner of those opportunities. The rest of Eric’s opportunities can be assigned to various team members using the same process, saving you a great deal of time in contrast to individually updating each record.
Simpler Processes from Here on Out
Seconds add up. That’s why it’s so important to find efficiencies wherever we can to make our work lives simpler and help our businesses thrive. By adopting a few easy - yet game-changing - productivity hacks, you can save time, money, and empower your team.
Remember: this concept can also apply to updating other inquiries within Acumatica. In some use cases, it’s even easier than creating an import scenario to update records. Change is inevitable, so making those changes shouldn’t be a bottleneck in your day to day. Subscribe to our YouTube channel to discover more Acumatica Tips & Tricks and take advantage of countless time-saving benefits.